This is a documentation for Board Game Arena: play board games online !
Tutorial hearts
Work in Progress
This page is work in progress don't use it until this banner is gone
Introduction
Using this tutorial, you can build a complete working game on the BGA environment: Hearts.
Before you read this tutorial, you must:
- Read the overall presentations of the BGA Framework (see here).
- Know the rules for Hearts
- Some-what know the languages used on BGA: PHP, SQL, HTML, CSS, Javascript
- Setup you development environment First Steps with BGA Studio
Create your first game
If you have not already, you have to create a project in BGA Studio. For this tutorial you can create a project heartsYOUNAME where YOUNAME is your developer login name. You can also re-use the project you have created for "First Steps" tutorial above. With the initial skeleton of code provided initially, you can already start a game from the BGA Studio.
Find and start the game in turn based mode, make sure it works.
Second modify the text in heartsYOUNAME_heartsYOUNAME.tpl, reload the page in the browser and make sure your ftp sync works as expected. Note: if you have not setup auto-sync do it now, manually copying files is a no-starter.
Hook version control system
If its a real game or even for this tutorial I would commit the code to version control right at start. You going to find yourself in the situation when game does not even start anymore and no way of debugging it unless you have a way to revert. That is where version control becomes very handy. If you don't know what I am talking about then at least back-up your files after each of major steps. Starting now.
Code for this tutorial available on github at https://github.com/elaskavaia/bga-heartsla
Different revisions represent different steps along the process, starting from original template to a complete game.
Update game infos and box graphics
Even it does not nothing yet I always start with making sure game looks descent in the game selector, meaning it has nice box graphics and information is correct. For that we need to edit gameinfos.inc.php. What you would do for real game you would go to http://boardgamegeek.com find the game and use the information from web-site to fill the gameinfos. So lets do that. Find "hearts" on boardgamegeek. Original release 1850 :) You can fill in year of publishing, bgg id, you can put Public Domain as publisher and publisher id is 171 for public domain. And as designer and author you can just put your own name just for fun. Set number of players to 4.
 // Players configuration that can be played (ex: 2 to 4 players)
 'players' => array( 4 ),
The next step is to replace game_box.png with nicer images. For this tutorial just copy all files from img/ folder of hearts/ template into img/ directory of your project. And replace publisher.png with nicer image for example https://github.com/elaskavaia/bga-sharedcode/blob/master/img/publisher.png. Details about images can be found here: Game art: img directory
Now important step. You have to LOAD these files in studio website through control panel. So go to Control Panel -> Manager Games -> heartsYOUNAME and press Reload for 'Reload game informations' and 'Reload game box image'
Now try to start the game again. If you some-how introduced a syntax error in gameinfos file it may not actually work (game won't start). Always use "Express Start" button to start the game. You should see a standard state prompt from template. You should see 4 players on the right, testdude0 .. testdude3. To switch between them press the red arrow button near their names, it will open another tab. This way you don't need to login and logout from multiple accounts!
Code Rev [1]
Layout and Graphics
In this section we will do graphics of the game, and main layout of the game.
First copy a sprite with cards from hearts img/cards.jpg into img/ folder of your project.
Edit .tpl to add some divs to represent player tableau and hand area
<div id="myhand_wrap" class="whiteblock">
    <h3>My Hand</h3>
    <div id="myhand">
    </div>
</div>
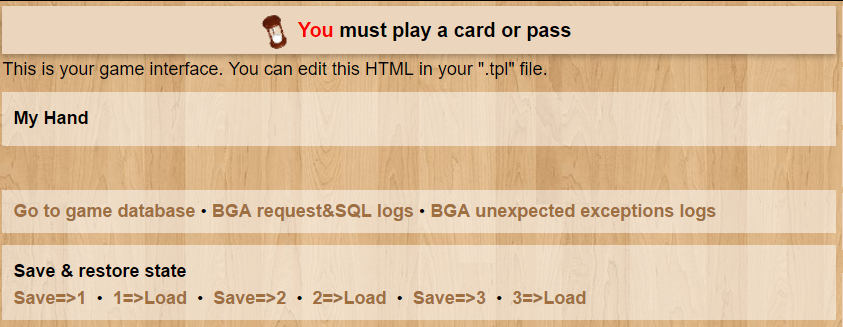
If you refresh you should see now white area with My Hand title.
Now lets add a card into the hand, just you can feel it. Edit .tpl and a
...
...
Edit .css file
.playertablecard {
    display: inline-block;
    position: relative;
    margin-top: 5px;
    width: 72px;
    height: 96px;
    background-image: url('img/cards.jpg');
}
When you edit CSS remember that you have to FORCE-reload page, i.e. Shift-F5, otherwise its cached. Same when you change existing graphics files.
You should see this:
Awesome! Now lets do the rest of layout.
There are few ways of how html could have been generated, you could have start with nothing and generate all by java script. Or you could have started with complete game markup in html and make java script just hide and move pieces around. BGA framework provides also a third way which is mix of both plus template engine to generate HTML using php. So lets do that.
Change .tpl file to have this inside
<div id="playertables">

    <!-- BEGIN player -->
    <div class="playertable whiteblock playertable_{DIR}">
        <div class="playertablename" style="color:#{PLAYER_COLOR}">
            {PLAYER_NAME}
        </div>
        <div class="playertablecard" id="playertablecard_{PLAYER_ID}">
        </div>
    </div>
    <!-- END player -->

</div>

<div id="myhand_wrap" class="whiteblock">
    <h3>{MY_HAND}</h3>
    <div id="myhand">
    </div>
</div>
That we did is we added "block" player, its marked up using html comments. {VAR} notation is used to inject variables and inside effectively allows up to do loops.
In .view.php insert this code after 'Place your code below' comment
        $template = self::getGameName() . "_" . self::getGameName();

        $directions = array( 'S', 'W', 'N', 'E' );

        // this will inflate our player block with actual players data
        $this->page->begin_block($template, "player");
        foreach ( $players as $player_id => $info ) {
            $dir = array_shift($directions);
            $this->page->insert_block("player", array ("PLAYER_ID" => $player_id,
                    "PLAYER_NAME" => $players [$player_id] ['player_name'],
                    "PLAYER_COLOR" => $players [$player_id] ['player_color'],
                    "DIR" => $dir ));
        }
        // this will make our My Hand text translatable
        $this->tpl['MY_HAND'] = self::_("My hand");
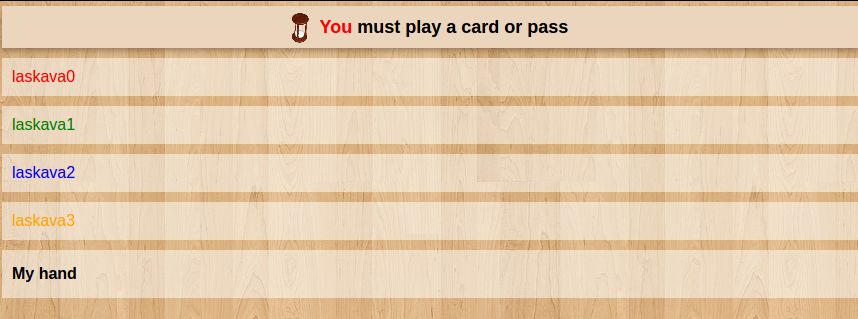
And reload. If everything went well you should see this:
These are "tableau" areas for 4 players plus My hand visible only to one player. They not exactly how we wanted them to be because we did not edit .css yet.
Now edit .css, add these line after import before our previous definition
/** Table layout **/

#playertables {
    position: relative;
    width: 710px;
    height: 340px;
}

.playertablename {
    font-weight: bold;
}

.playertable {
    position: absolute;
    text-align: center;
    width: 180px;
    height: 130px;
}

.playertable_N {
    left: 50%;
    top: 0px;
    margin-left: -90px; /* half of 180 */
}
.playertable_S {
    left: 50%;
    bottom: 0px;
    margin-left: -90px; /* half of 180 */
}
.playertable_W {
    left: 0px;
    top: 50%;
    margin-top: -55px; /* half of 130 */
}
.playertable_E {
    right: 0px;
    top: 50%;
    margin-top: -55px; /* half of 130 */
}
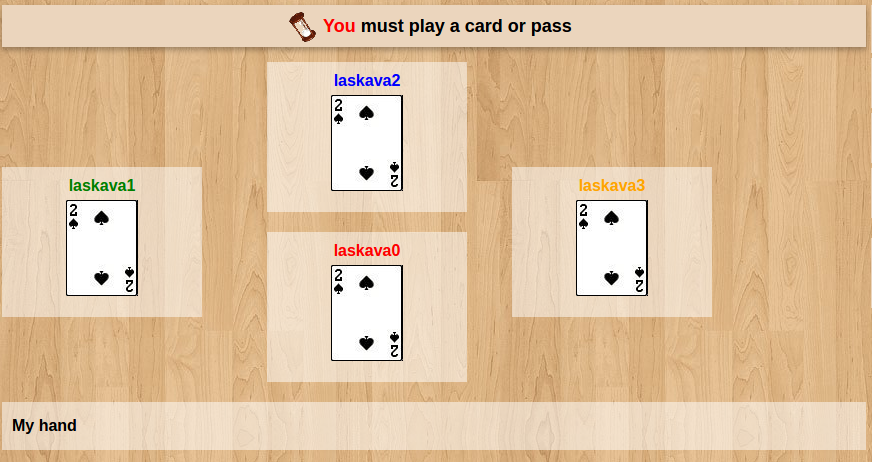
Now you Shift-Reload and you should see this:

Lets almost all we need for graphics and layout, there are few tweaks left there but lets do some more heavy lifting now.
Game Interface JS Stock
BGA framework provides few out of the box classes to deal with cards. The client side contains class called Stock and it can be used for any dynamic html 'pieces' management that uses common sprite image. On the server side we will use Deck class which we get to later.
If you open cards.jpg in viewer we can see that this is "sprite" image, 13x4 grid of images stitched together, which is very efficient way to transport images. So we will use Stock to mark up these images and create "card" divs for us.
At first, we need to add "ebg/stock" as a dependency:
define([
    "dojo","dojo/_base/declare",
    "ebg/core/gamegui",
    "ebg/counter",
    "ebg/stock"     /// <==== HERE
],
Then add this to js contructor, this will define size of our cards
            console.log('hearts constructor');
            this.cardwidth = 72;
            this.cardheight = 96;
The stock is initialized in Javascript "setup" method like this:
    // TODO: Set up your game interface here, according to "gamedatas"

    // Player hand
    this.playerHand = new ebg.stock(); // new stock object for hand
    this.playerHand.create( this, $('myhand'), this.cardwidth, this.cardheight );
As parameters of the "create" method, we provided the width/height of an item (a card), and the container div "myhand" - which is an id of "div" element from our .tpl file representing player hand.
Then, we must tell the stock what are the items it is going to display during its life: the 52 cards of a standard card game from "CSS sprite" image named "cards.jpg" with all the cards arranged in 4 rows and 13 columns.
Here's how we tell stock what are the items type to display:
            this.playerHand.image_items_per_row = 13; // 13 images per row


            // Create cards types:
            for (var color = 1; color <= 4; color++) {
                for (var value = 2; value <= 14; value++) {
                    // Build card type id
                    var card_type_id = this.getCardUniqueId(color, value);
                    this.playerHand.addItemType(card_type_id, card_type_id, g_gamethemeurl + 'img/cards.jpg', card_type_id);
                }
            }
And add this function to utilities section
        // Get card unique identifier based on its color and value
        getCardUniqueId : function(color, value) {
            return (color - 1) * 13 + (value - 2);
        },
Explanations:
- At first, we tell the stock component that our CSS sprite contains 13 items per row. This way, it can find the correct image for each card type id.
- Then for the 4x13 cards, we call "addItemType" method that create the type. The arguments are the type id, the weight of the card (for sorting purpose), the URL of our CSS sprite, and the position of our card image in the CSS sprite. It happens to be the same number in our case.
Note: we need to generate a unique ID for each type of card based on its color and value. For that we create a function "getCardUniqueId".
Now lets add the 5 of Heart to player's hand just for fun (this code will go in setup method after types initialization):
// 2 - hears, 5 is 5, and 42 is card id, it normally would come from db
this.playerHand.addToStockWithId( this.getCardUniqueId( 2, 5 ), 42 );
If you reload now you should see 5 of hearts in "your hand".
Stock control can handle clicking on items and forms the selection, you can immediately react to selection or you can query it later, for example when user presses some other button.
Lets hook it up, add this in setup method, after this.playerHard is initialised
dojo.connect( this.playerHand, 'onChangeSelection', this, 'onPlayerHandSelectionChanged' );
Then find Player's action comment section and add handler after the comment
        onPlayerHandSelectionChanged : function() {
            var items = this.playerHand.getSelectedItems();

            if (items.length > 0) {
                if (this.checkAction('playCard', true)) {
                    // Can play a card

                    var card_id = items[0].id;
                    console.log("on playCard "+card_id);

                    this.playerHand.unselectAll();
                } else if (this.checkAction('giveCards')) {
                    // Can give cards => let the player select some cards
                } else {
                    this.playerHand.unselectAll();
                }
            }
        },
No if you reload, open js Console, click on card in My Hand and you should see
on playCard 42
printed on the console
Game Database and Game Initialisation
Next step you want to design game database and setup new game (on server side). For that we need a) modify database schema to add our cards data b) add some global "variables" into existing table
To modify schema first exit you existing game(s). Open dbmodel.sql file and uncomment card table creation
CREATE TABLE IF NOT EXISTS `card` (
  `card_id` int(10) unsigned NOT NULL AUTO_INCREMENT,
  `card_type` varchar(16) NOT NULL,
  `card_type_arg` int(11) NOT NULL,
  `card_location` varchar(16) NOT NULL,
  `card_location_arg` int(11) NOT NULL,
  PRIMARY KEY (`card_id`)
) ENGINE=InnoDB DEFAULT CHARSET=utf8 AUTO_INCREMENT=1 ;
This is "card" table which would be managed by Deck php class.
In addition we want a little piece of information in the players table:
 -- add info about first player
 ALTER TABLE `player` ADD `player_first` BOOLEAN NOT NULL DEFAULT '0';
Not sure why they put this into player table, we could have global db variable to hold first player as easily. But I am just following existing code more-less.
Next we finally get into .game.php class, where the main logic and db interaction would be. Find php constructor which should be
function __construct( )
This is first function in a file.
        parent::__construct();
        self::initGameStateLabels( array(
                         "currentHandType" => 10,
                         "trickColor" => 11,
                         "alreadyPlayedHearts" => 12,
                          ) );

        $this->cards = self::getNew( "module.common.deck" );
        $this->cards->init( "card" );
Here we are initializing three "Game State Variables" which are variable stored in database. They are integers. It must start with no lower then 10 since the others ones are reserved. These values are stored by numeric id's in the database, but in the php we associate them with string labels for convenience of access. The variables are "trickColor" - numbers from 1 to 4 that map to card suit (not sure why its called color maybe its translation from french); "alreadyPlayedHearts" - is boolean flag (well 0 or 1) indication either somebody use trump on the trick (well hearts in this game is always trump); "currentHandType" - stores the value to indicate who to give cards during exchange.
Next 2 lines are creating $this->cards object and associating it with "card" table in the the database.
If we called table foo the last statement would have been $this->cards->init( "foo" )
At this point I would start a new game and make sure it starts, then exit.
If you made a mistake in .sql or php constructor game won't start and good luck debugging it (that is why it important to check once in a while to make sure it still starts while you remember what you have changed)
Code Rev [2]
To be continued...


